Educational Kits
Educational Kits
A set of miniature welds, macro sections and photo-radiographs to demonstrate the principles of flaw detection, flaw interpretation and basic sizing.

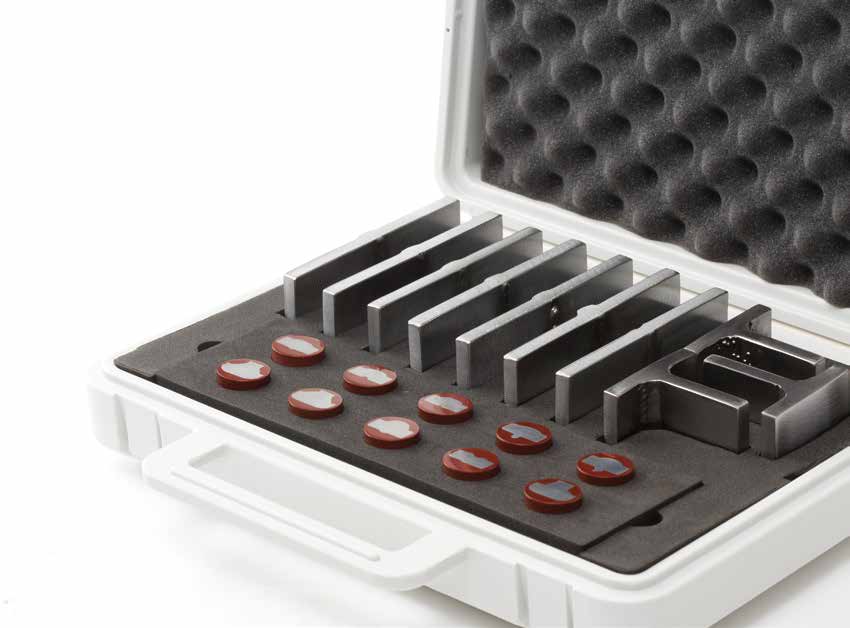
Fot: Visual Kit contains 10 macro section of varous flaws
Recommended for
- Introduction to weld flaws
- Demonstrate principles of flaw detection
- Demonstrate typical flaw interpretation
- Basic flaw sizing
Kit contents
- 10 miniature flawed specimens, each implanted with one flaw
- Flaw location details
- Testing and acceptance criteria
- Photo-radiographs (where applicable) for each specimen
- 10 Macro sections
- Magnifying glass
- Certificate of conformance
Methods
- Demonstration kit covering all methods
- Ultrasonic testing
- Magnetic particle testing
- Penetrant testing
- Visual testing
- Radiographic testing
Materials
- Carbon Steel
- Stainless Steel
- Aluminium
Kits are presented in a durable polypropylene case with high density black molded inserts.
Kit types and contents
Demonstration kit (KTCS91) - 12 kg / 29 lbs
The 1 tee and 9 plate specimens are a variety of pieces carefully selected from each of the other kits in order to provide an overview of flaw types and their detection using various non-destructive testing techniques.
Ultrasonic kit (KTCS86) - 12 kg / 26 lbs
The 1 tee and 9 plate specimens contain a selection of commonly occurring surface-breaking and weld-body flaws.
Visual kit (KTCS87) - 12 kg / 26 lbs
The 3 tee and 7 plate specimens contain a selection of commonly occurring visual welding flaws and irregularities.
Magnetic particle (KTCS88) & Penetration kit (KTCS89) - 12 kg / 26 lbs
The 3 tee and 7 plate specimens contain a selection of commonly occurring surface-breaking flaws.
Radiographic kit (KTCS90) - 12 kg / 26 lbs
The 1 tee and 9 plate specimens contain a selection of commonly occurring surface-breaking and weld-body flaws.
Weld flaw identification kit (KTCS92) - 7 kg / 15 lbs
Contains 30 macro sections showing flaws in cross section.
| MT KIT | PT KIT | VT KIT | Demo KIT | UT KIT | RT KIT | Weld ID KIT | ||||
| Def 1 | Toe Crack | |||||||||
| Def 1A | Toe Crack | |||||||||
| Def 1B | Toe Crack | |||||||||
| Def 1C | Toe Crack (Full Pen) | |||||||||
| Def 2 | Root Crack | |||||||||
| Def 3 | Side Wall Crack | |||||||||
| Def 4 | Centre Line Crack Surface | |||||||||
| Def 5 | Centre Line Crack Weld Body | |||||||||
| Def 6 | Porosity Weld Body | |||||||||
| Def 6A | Porosity Surface Breaking | |||||||||
| Def 7 | Slag | |||||||||
| Def 8 | Lack of Side Wall Fusion | |||||||||
| Def 9 | Lack of Root Fusion | |||||||||
| Def 10 | Root Concavity | |||||||||
| Def 11 | Incomplete Root Penetration SV | |||||||||
| Def 12 | Over Penetration | |||||||||
| Def 13 | Incomplete Root Penetration DV | |||||||||
| Def 14 | Lamination | |||||||||
| Def 14A | Lamination Weld Preparation | |||||||||
| Def 14B | Lamination | |||||||||
| Def 15 | Irregular Root Penetration | |||||||||
| Def 16 | Weld Spatter | |||||||||
| Def 17 | Udercut | |||||||||
| Def 18 | Excess Cap | |||||||||
| Def 19 | Mismatch Plate | |||||||||
| Def 20 | Misalignment Plate | |||||||||
| Def 21 | Crack Surface Breaking | |||||||||
| Def 21A | Crack Subsurface Cap Removed | |||||||||
| Def 22 | Concave Cap | |||||||||
| Def 22A | Incomplete Weld Fill | |||||||||
| Def 23 | Uneven Leg Lengths | |||||||||
| Def 26 | Lack of Inter Run Fusion | |||||||||
| Def 27 | Underflush |